
I've put off doing laundry for a few days because my dog needs a new dog bed cover. I need to wash the one that's on hers, but until about an hour ago, it would have meant taking away her dog bed for two days (we don't have a dryer). Today I finally made one. Basically, it's a pillow cover. My original idea was to do more of a European Pillow sham closure by altering this pattern, but it basically became exactly what the pattern describes how to do. With buttons.


A word about the fabric: the pictures don't accurately convey how incredibly glow-in-the-dark pink that is. I got it in an awesome pile from my mom (which also contained the terry cloth for the wetjet reusable pads). I don't blame my mom for having this fabric, but I do blame the early 90's for making it. There used to be another double sided fabric that was black and a nice cerulean blue that became many, many, many canvas style bags (I think some were made for a church thing) that I liked. This fabric? I don't think it was touched because I have a LOT of it. Since it's home decorating fabric (60"), I don't just have yardage, I have width. So why did I decide to use it? It's sturdy and able to handle a dog's nails, licking (yes, my dog licks her bed), flopping, and being on a hard floor that has the potential to grind rocks and dirt into the bed.
I would like to say that I utilized the unique nature of this fabric by putting the contrasting pink on the bottom.... but I didn't. In fact, when I showed my husband the fabric, I told him I was only going to use the navy side. I pinned it wrong. By the time I realized this, I'd sewn two sides and decided to just go with it. Ironically, I had been thinking throughout "oh, remember when I pinned that dress backwards and I had to rip out a bunch of stitches? That sucked."
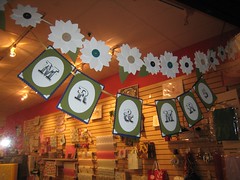
On a plus side, I got more experience with button holes. They aren't particularly hard, but it's always good to have more experience with what side of the buttonhole your machine starts the stitching, etc before doing it on something like a shirt. The buttons I used were leftovers from my wedding. When I worked at Cherish* in San Francisco, my fellow designer Stacy had an awesome idea for a flower garland to put in our store window. We used the die cutting machine to cut out many, many, many white flowers, sewed a button center, and put it up on a ribbon. Two months later, I made it for my wedding.
The buttons didn't quite fit in my buttonhole foot (too thick, tiny bit too wide), so I did a test of the largest buttonhole I could make with the foot to see if it would fit. Luckily, it did! It's a tiny bit tight, but since it won't be opened and closed a lot unless I'm cleaning, it's absolutely fine. The button also didn't fit in the button foot, so I handsewed those.
* I no longer work for Cherish or live in San Francisco, but if you are interested, they do rent out studio time where you can use their die cutting machine and make these yourself. Fabrix, a discount fabric shop, is next door and where we got all the buttons- they have a bin full of amazing buttons to dig through.
No comments:
Post a Comment